天行健,君子以自强不息;地势坤,君子以厚德载物。
每个人都有惰性,但不断学习是好好生活的根本,共勉!
文章均为学习整理笔记,分享记录为主,如有错误请指正,共同学习进步。
蜀国曾闻子规鸟,宣城还见杜鹃花。
一叫一回肠一断,三春三月忆三巴。
------《宣城见杜鹃花》
文章目录
Node.js的下载、安装和配置
node的下载、安装、配置和使用(node.js下载安装和配置、npm命令汇总、cnpm的使用)
Vue3入门之创建vue3的单页应用(vite+vue)
Vue入门第一篇(环境配置、脚手架安装、项目创建、项目运行访问、项目结构详解等)
Vue入门第二篇(基本语法、实例演示)
Vue专栏
Vue入门之Emits Slots Confetti
文末附本文所有示例代码的下载地址以及基于vite构建vue3的项目demo地址
1. Emits
触发事件,子组件向父组件触发事件
emit()的第一个参数是事件的名称,其它所有参数都将传递给事件监听器
父组件可使用v-on监听子组件触发的事件
函数接收子组件触发事件时的额外参数并将它复制给本地状态
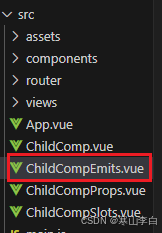
1.1 子组件创建
在src文件夹下创建子组件ChildCompEmits.vue
子组件的代码如下
<script setup>
    //声明触发的事件
    const emit = defineEmits(['response'])
    //带参数触发
    emit('response', 'hello from parent')
</script>

<template>
    <h2>Child component</h2>
</template>
以下代码均为App.vue中编写
1.2 script setup
script setup标签内的代码
// 12. Emits
import ChildCompEmits from './ChildCompEmits.vue'
const childMsg = ref('No child msg yet')
1.3 template
template标签内的代码
  <!-- 12.  -->
  <div>
    <h2>12. Emits</h2>
    <ChildCompEmits id="c-12" @response="(msg) => childMsg = msg" />
    <p id="p-12">{
  { childMsg }}</p>
  </div>
1.4 style scoped
style scoped标签内的代码
/* 12.  */
#c-12{
  height: 80px;
  width: 400px;
  text-align: center;
  border-radius: 15px;
  background-color: lightblue;
  font-size: 40px;
  font-family: 'Courier New';
}

#p-12{
  height: 100px;
  width: 600px;
  text-align: center;
  border-radius: 15px;
  background-color: chocolate;
  font-size: 50px;
  font-family: 'Courier New';
}
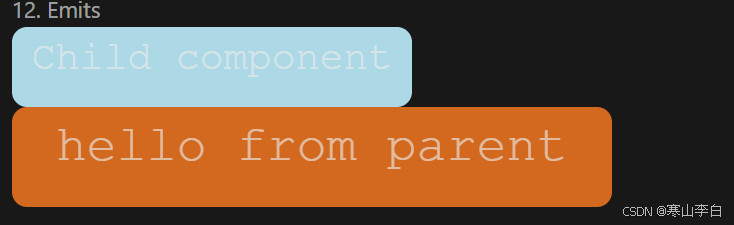
1.5 页面效果
控制台npm run dev启动项目,访问服务页面http://localhost:5173/
查看页面效果,子组件中的内容为Child component,也就是CildCompEmits标签中的内容
而p标签中的内容是childMsg变量的值,当子组件触发事件msg的值会传给childMsg,
msg的值就是事件response对应的参数'hello from parent'
2. Slots
插槽
父组件通过插槽将模板片段传递给子组件
在子组件中使用slot标签元素作为插槽出口slot outlet渲染父组件中的插槽内容slot content
slot中的内容被当做默认内容,会在父组件未传递任何插槽内容时显示
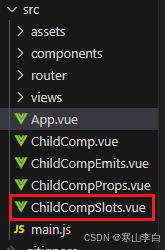
2.1 子组件创建
在src文件夹下创建子组件ChildCompSlots.vue
子组件中代码如下
<template>
    <slot>Fallback content</slot>
</template>
以下内容均为App.vue中编写
2.2 script setup
script setup标签内的代码
// 13. slots 插槽
import ChildCompSlots from './ChildCompSlots.vue'
//父组件通过插槽slots将模板片段传递给子组件
const msg = ref('from parent')
2.3 template
template标签内的代码
  <!-- 13.  -->
  <div>
    <h2>13. slots</h2>
    <ChildCompSlots id="c-13">Message: {
  { msg }}</ChildCompSlots>
    <p id="p-13">
      {
  {msg}}
    </p>
  </div>
2.4 style scoped
style scoped标签内的代码
/* 13.  */
#c-13{
  height: 100px;
  width: 400px;
  text-align: center;
  border-radius: 15px;
  background-color: lightblue;
  font-size: 40px;
  font-family: 'Courier New';
}

#p-13{
  height: 80px;
  width: 400px;
  text-align: center;
  border-radius: 15px;
  background-color: darkkhaki;
  font-size: 40px;
  font-family: 'Courier New';
}
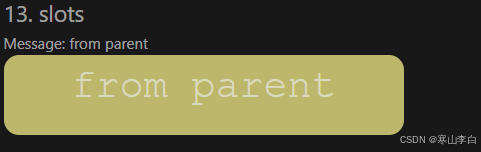
2.5 页面效果
控制台npm run dev启动项目,访问服务页面http://localhost:5173/
查看页面效果,子组件中默认显示的内容为Fallback content,通过slot在js中将msg传入ChildCompSlots标签
3. Congratulations动态效果实现
使用confetti组件库实现
首先需要使用管理员身份打开cmd窗口,cd到当前项目目录下,使用命令安装组件库js-confetti
npm install js-confetti
如果还没引入package.json,则需使用命令下载依赖
npm install
接下来就是引用组件库
3.1 script setup
script setup标签内的代码
// 14. congratulations 恭喜完成所有学习任务
import JSConfetti from 'js-confetti'
//这里需要先安装js-confetti,使用管理员身份打开命令行窗口,cd进入本项目目录下,使用npm或者yarn安装即可,这里用npm install js-confetti
// 在安装后,需要在package.json中查看是否已经有了confetti依赖,如过没有,使用npm install命令安装依赖即可
const confetti = new JSConfetti()
function showConfetti(){

  confetti.addConfetti()
  console.log("0000")
}
showConfetti()
3.2 template
template标签内的代码
  <!-- 14.  -->

  <div>
    <h2>14. Congratulations</h2>
    <h1 id="h-14" @click="showConfetti">🎉Congratulations!</h1>
  </div>
3.3 style scoped
style scoped标签内的代码
/* 14.  */
#h-14{
  height: 150px;
  width: 400px;
  text-align: center;
  border-radius: 15px;
  background-color: fuchsia;
  font-size: 40px;
  font-family: 'Courier New';
}
3.4 页面效果
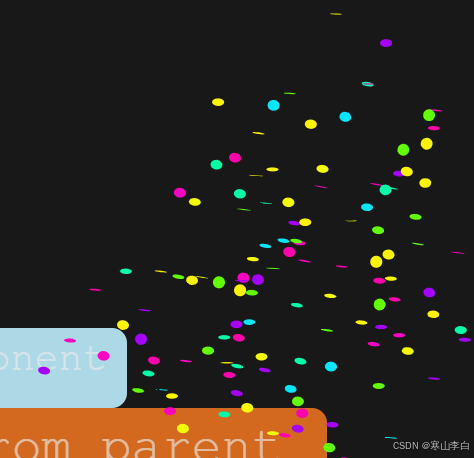
控制台npm run dev启动项目,访问服务页面http://localhost:5173/
查看页面效果,只需点击颜色区域即可触发庆祝特效,刷新页面也可触发
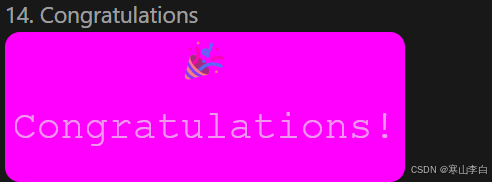
特效会从两侧向中间喷撒礼花
4. 代码示例
以上示例的代码已打包上传到CSDN资源库,可自行下载获取示例代码
下载地址:Vue Emits Slots Congratulations 语法示例演示代码
5. 项目demo
本文示例代码都是基于vite构建的vue3项目编写,项目demo也已上传CSDN资源库
下载地址:Vue 基于vite构建vue3项目 以及基础语法演示
下载后如想正常运行项目,需先有node环境,可根据文章开始的链接进行下载安装node环境,以及配置node环境变量
感谢阅读,祝君暴富!
原文链接: https://hanshan.blog.csdn.net//article/details/140498476