Java程序访问Redis
采用jedis API进行访问即可
-
关闭RedisServer端的防火墙
systemctl stop firewalld(默认) systemctl disable firewalld.service(设置开启不启动) -
新建maven项目后导入Jedis包
pom.xml<dependency> <groupId>redis.clients</groupId> <artifactId>jedis</artifactId> <version>2.9.0</version> </dependency> -
写程序
@Test
public void testConn(){

	//与Redis建立连接 IP+port
	Jedis redis = new Jedis("192.168.127.128", 6379);
	//在Redis中写字符串 key value
	redis.set("jedis:name:1","jd-zhangfei");
	//获得Redis中字符串的值
	System.out.println(redis.get("jedis:name:1"));
	//在Redis中写list
	redis.lpush("jedis:list:1","1","2","3","4","5");
	//获得list的长度
	System.out.println(redis.llen("jedis:list:1"));
}
Spring访问Redis
- 创建spring工程后引入相关的依赖
    <properties>
        <spring.version>5.2.14.RELEASE</spring.version>
    </properties>
    <dependencies>
        <dependency>
            <groupId>org.springframework</groupId>
            <artifactId>spring-beans</artifactId>
            <version>${spring.version}</version>
        </dependency>
        <dependency>
            <groupId>org.springframework</groupId>
            <artifactId>spring-core</artifactId>
            <version>${spring.version}</version>
        </dependency>
        <dependency>
            <groupId>org.springframework</groupId>
            <artifactId>spring-context</artifactId>
            <version>${spring.version}</version>
        </dependency>
        <dependency>
            <groupId>org.springframework</groupId>
            <artifactId>spring-test</artifactId>
            <version>${spring.version}</version>
        </dependency>
        <dependency>
            <groupId>junit</groupId>
            <artifactId>junit</artifactId>
            <version>4.13.1</version>
            <scope>test</scope>
        </dependency>
        <dependency>
            <groupId>org.springframework.data</groupId>
            <artifactId>spring-data-redis</artifactId>
            <version>2.2.9.RELEASE</version>
        </dependency>
        <dependency>
            <groupId>redis.clients</groupId>
            <artifactId>jedis</artifactId>
            <version>3.3.0</version>
        </dependency>
    </dependencies>

    <build>
        <plugins>
            <plugin>
                <groupId>org.apache.maven.plugins</groupId>
                <artifactId>maven-compiler-plugin</artifactId>
                <version>3.8.1</version>
                <configuration>
                    <source>11</source>
                    <target>11</target>
                    <testSource>11</testSource>
                    <testTarget>11</testTarget>
                    <encoding>UTF-8</encoding>
                </configuration>
            </plugin>
        </plugins>
    </build>
- 创建spring配置文件和redis配置文件
首先是spring配置文件applicationContext.xml
<?xml version="1.0" encoding="UTF-8"?>
<beans xmlns="http://www.springframework.org/schema/beans"
       xmlns:xsi="http://www.w3.org/2001/XMLSchema-instance"
       xmlns:context="http://www.springframework.org/schema/context"
       xsi:schemaLocation="http://www.springframework.org/schema/beans
       http://www.springframework.org/schema/beans/spring-beans.xsd
       http://www.springframework.org/schema/context
       https://www.springframework.org/schema/context/spring-context.xsd">
    <context:property-placeholder location="classpath*:redis.properties"></context:property-placeholder>

    <bean id="jedisPoolConfig" class="redis.clients.jedis.JedisPoolConfig">
        <property name="maxIdle" value="${redis.maxIdle}"></property>
        <property name="maxTotal" value="${redis.maxTotal}"></property>
        <property name="maxWaitMillis" value="${redis.maxWaitMillis}"></property>
        <property name="testOnBorrow" value="${redis.testOnBorrow}" ></property>
    </bean>

    <bean id="redisConfiguration" class="org.springframework.data.redis.connection.RedisStandaloneConfiguration">
        <property name="hostName" value="${redis.host}"></property>
        <property name="port" value="${redis.port}"></property>
    </bean>

    <bean id="jedisConnectionFactory" class="org.springframework.data.redis.connection.jedis.JedisConnectionFactory">
        <constructor-arg ref="redisConfiguration"></constructor-arg>
        <property name="timeout" value="${redis.timeout}"></property>
        <property name="poolConfig" ref="jedisPoolConfig"></property>
    </bean>

    <bean id="redisTemplate" class="org.springframework.data.redis.core.RedisTemplate">
        <property name="connectionFactory" ref="jedisConnectionFactory"></property>
        <property name="keySerializer">
            <bean class="org.springframework.data.redis.serializer.StringRedisSerializer">
            </bean>
        </property>
        <property name="valueSerializer">
            <bean class="org.springframework.data.redis.serializer.StringRedisSerializer"></bean>
        </property>
    </bean>

</beans>
然后是redis客户端的配置文件redis.properties
redis.maxTotal=10
redis.maxIdle=5
redis.maxWaitMillis=20000
redis.testOnBorrow=false
redis.host=192.168.31.10
redis.port=6379
redis.timeout=50000
3. 创建测试类
/**
 * @author Elvis
 * @create 2021-08-08 22:47
 */

import org.junit.Before;
import org.junit.Test;
import org.springframework.context.support.ClassPathXmlApplicationContext;
import org.springframework.data.redis.core.RedisTemplate;

import java.io.Serializable;

/**
 * @program: redis-study
 * @Description
 * @author Elvis
 * @date 2021-08-08 22:47
 */
public class RedisTest {


    ClassPathXmlApplicationContext applicationContext = null;
    RedisTemplate<Serializable, Serializable> redisTemplate = null;

    @Before
    public void before() {

        applicationContext = new ClassPathXmlApplicationContext("classpath*:applicationContext.xml");
        redisTemplate = (RedisTemplate) applicationContext.getBean("redisTemplate");

    }

    @Test
    public void test1() {

        redisTemplate.opsForValue().set("name", "zhaoyun");
    }

    @Test
    public void test2() {

        String name = (String) redisTemplate.opsForValue().get("name");
        System.out.println(name);
    }

}
先执行插入,再执行查询

SpringBoot访问Redis
-
新建工程后添加pom依赖
<parent> <artifactId>spring-boot-starter-parent</artifactId> <groupId>org.springframework.boot</groupId> <version>2.4.2</version> </parent> <dependencies> <dependency> <groupId>org.springframework.boot</groupId> <artifactId>spring-boot-starter-web</artifactId> </dependency> <dependency> <groupId>org.springframework.boot</groupId> <artifactId>spring-boot-starter-data-redis</artifactId> </dependency> <dependency> <groupId>org.springframework.boot</groupId> <artifactId>spring-boot-test</artifactId> </dependency> <dependency> <groupId>redis.clients</groupId> <artifactId>jedis</artifactId> </dependency> </dependencies> <build> <plugins> <plugin> <groupId>org.apache.maven.plugins</groupId> <artifactId>maven-compiler-plugin</artifactId> <version>3.8.1</version> <configuration> <source>11</source> <target>11</target> <testSource>11</testSource> <testTarget>11</testTarget> <encoding>UTF-8</encoding> </configuration> </plugin> </plugins> </build> -
添加配置文件application.yml
spring: redis: host: 192.168.31.10 port: 6379 jedis: pool: max-active: 8 max-idle: 1 max-wait: 20000 client-type: jedis -
添加配置类RedisConfig
package com.elvis.config; /** * @author Elvis * @create 2021-08-09 7:43 */ import org.springframework.beans.factory.annotation.Autowired; import org.springframework.context.annotation.Bean; import org.springframework.context.annotation.Configuration; import org.springframework.data.redis.connection.RedisConnectionFactory; import org.springframework.data.redis.core.RedisTemplate; import org.springframework.data.redis.serializer.StringRedisSerializer; /** * @program: redis-study * @Description * @author Elvis * @date 2021-08-09 7:43 */ @Configuration public class RedisConfig { @Autowired RedisConnectionFactory connectionFactory; @Bean public RedisTemplate<String, Object> redisTemplate() { RedisTemplate<String, Object> redisTemplate = new RedisTemplate<>(); redisTemplate.setValueSerializer(new StringRedisSerializer()); redisTemplate.setStringSerializer(new StringRedisSerializer()); redisTemplate.setHashValueSerializer(new StringRedisSerializer()); redisTemplate.setHashKeySerializer(new StringRedisSerializer()); redisTemplate.setKeySerializer(new StringRedisSerializer()); redisTemplate.setConnectionFactory(connectionFactory); return redisTemplate; } } -
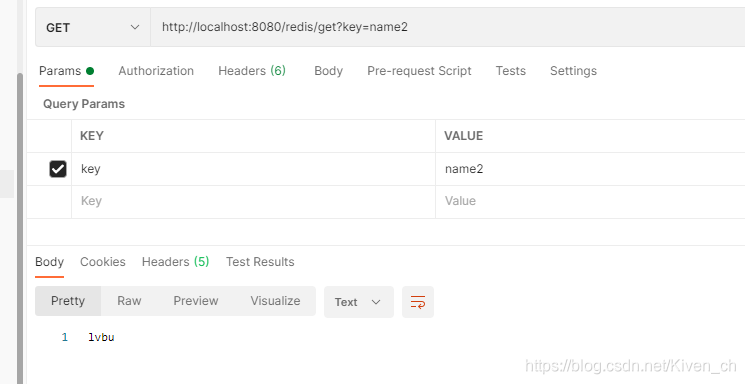
添加RedisController
package com.elvis.controller; /** * @author Elvis * @create 2021-08-09 7:48 */ import org.springframework.beans.factory.annotation.Autowired; import org.springframework.data.redis.core.RedisTemplate; import org.springframework.web.bind.annotation.RequestMapping; import org.springframework.web.bind.annotation.RequestParam; import org.springframework.web.bind.annotation.RestController; /** * @program: redis-study * @Description * @author Elvis * @date 2021-08-09 7:48 */ @RestController @RequestMapping("/redis") public class RedisController { @Autowired RedisTemplate<String, Object> redisTemplate; @RequestMapping("/put") public String put(@RequestParam(required = true) String key, @RequestParam(required = true) String value) { redisTemplate.opsForValue().set(key, value); return "success"; } @RequestMapping("/get") public String get(@RequestParam(required = true) String key) { Object o = redisTemplate.opsForValue().get(key); return (String) o; } } -
修改Application并运行
package com.elvis;
/**
 * @author Elvis
 * @create 2021-08-09 8:08
 */

import org.springframework.boot.SpringApplication;
import org.springframework.boot.autoconfigure.SpringBootApplication;
import org.springframework.cache.annotation.EnableCaching;

/**
 * @program: redis-study
 * @Description
 * @author Elvis
 * @date 2021-08-09 8:08
 */
@SpringBootApplication
@EnableCaching
public class RunBoot {

    public static void main(String[] args) {

        SpringApplication.run(RunBoot.class, args);
    }
}
原文链接: https://blog.csdn.net/Kiven_ch/article/details/119548254